How to run an Epitope Mapping job
-
Step 1. On the LensAI™ Home Page, click "Run Analysis"

-
Step 2. Locate the Epitope Mapping analysis and click "Run Job"
- Step 3. Select the input files from datasets for the binders, the target and the reference binder. The reference binder is optional and can be left empty if no reference binder needs to be analyzed.
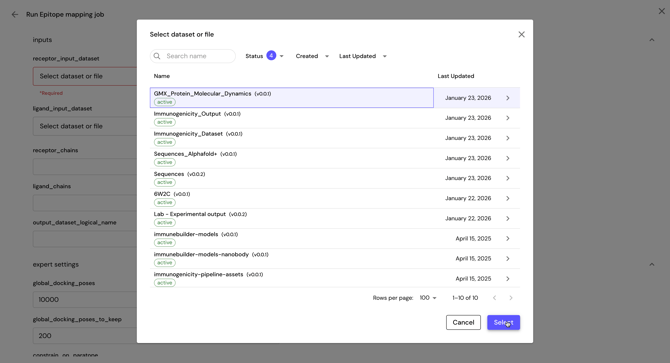
Caution: For each input, a single file must be chosen from a dataset, not the dataset itself.
-
- Step 3a. For the binders, choose either a .fasta file or a .csv file to represent the binder sequences. The content of the file can represent a single or multiple binders as follows.
- If the input file is a .fasta file, the headers need to have following formatting:
- Headers must end with
_VHfor heavy chains and_VLfor light chains. - Both chains of the same antibody must share the same base name (e.g.,
antibody_1_VHandantibody_1_VLsharingantibody_1as their basename in the example below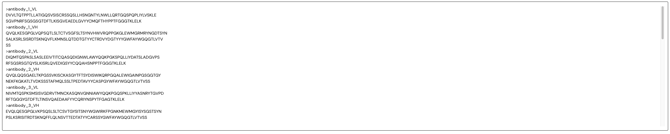
- Headers must end with
- If the input is a .csv file, the column names need to include
protein_namechain_name(VHindicating heavy chain orVLindicating light chain)chain_sequence(the sequence string)
protein_nameare taken together as a single (multimeric) protein.
- If the input file is a .fasta file, the headers need to have following formatting:
- Step 3b. For the target, choose either a .fasta file or a .csv file to represent the target sequences. The content of the file can only represent a single target protein as follows.
- If the input file is a .fasta file, the headers are ignored and all sequences in the file are taken as chains that constitute the (multimeric) target.
- If the input is a .csv file, the column names need to include
protein_namechain_name(VHindicating heavy chain orVLindicating light chain)chain_sequence(the sequence string)
protein_nameare taken together as a single (multimeric) protein.
- Step 3a. For the binders, choose either a .fasta file or a .csv file to represent the binder sequences. The content of the file can represent a single or multiple binders as follows.
Caution: Since only a single target is allowed, all rows must have the same protein_name. If more than one protein is provided, the pipeline will fail.
-
- Step 3c. For the reference binder, choose either a .fasta file or a .csv file to represent its sequences. The content of the file can only represent a single reference binder as follows.
- If the input file is a .fasta file, the headers are ignored and all sequences in the file are taken as chains that constitute the (multimeric) reference binder.
- If the input is a .csv file, the column names need to include
protein_namechain_name(VHindicating heavy chain orVLindicating light chain)chain_sequence(the sequence string)
protein_nameare taken together as a single (multimeric) protein.
- Step 3c. For the reference binder, choose either a .fasta file or a .csv file to represent its sequences. The content of the file can only represent a single reference binder as follows.
Caution: Since only a single reference binder is allowed. all rows must have the same protein_name. If more than one reference binder is provided, the pipeline will only consider the first one defined in the file.
- Step 4. Define the output dataset logical name
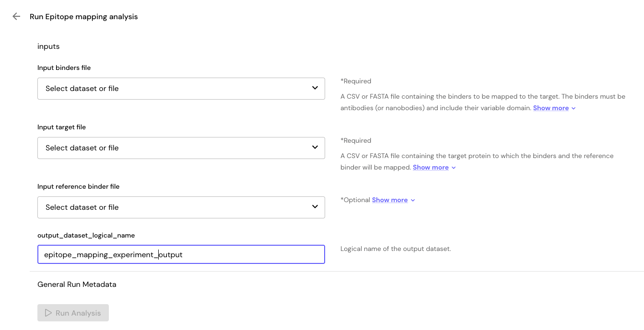
Caution: The name of the output dataset should not contain any space. Underscore is accepted.
- Step 5. Optionally provide experiment details under the General Run Metadata Inputs
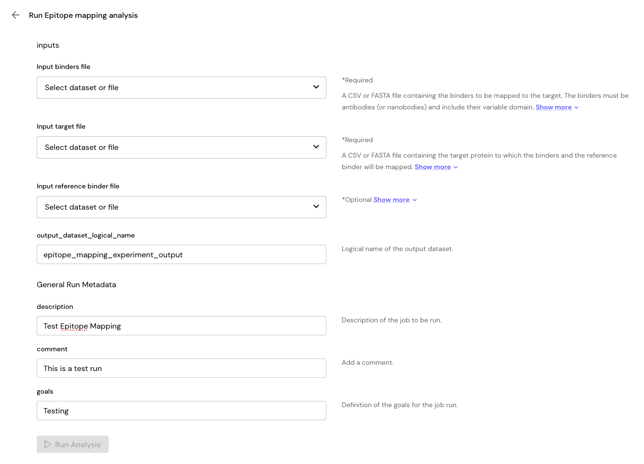
- Step 6. Click "Run Job" to launch the application
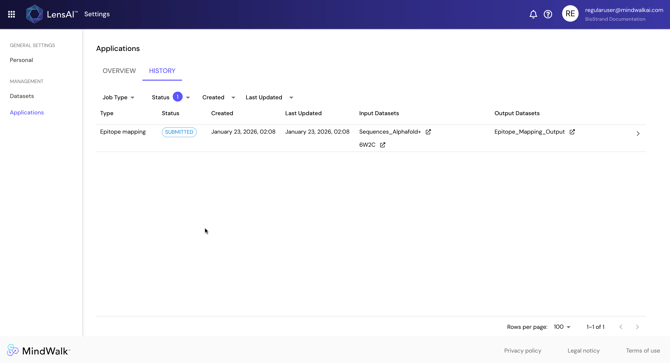
- Step 7. Monitor the state and the results of the analysis in the "Applications" page under the "History" tab